Transfer Donations
The Transfer Donations screen moves donations from one record to another.
![]()
Access Transfer Donations
To access from the Button Bar, go to Givers > Transfer Donations.
![]()
How to Transfer Donations to Correct the Giver
![]()
In this scenario, giving was assigned to the incorrect giver. This process will reverse and re-post the donation on the correct giver.
-
Enter a Date Range
The default date range is for the current year. To expand or narrow that range, choose your dates and click
 . Text on this button appears in maroon when changes have not yet been applied. Use the
  and
and  buttons to quickly change the year.
 -
Select 'From' Giver

On the left side, search for the giver to whom the donation was first assigned. Include Inactive records with the check-box above the drop down. The drop down list can be Sorted by # with a check box, or alphabetically, left unchecked.
Only givers with donations within the specified date range will list in the drop down.
-
Select Donation(s)
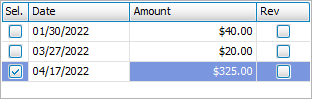
Donations assigned to the 'From Giver' will list in the area below. You can
 if all donations need to be transferred or
  to check individual donations in the Sel. column.
 -
Select 'To' Giver

On the right side, search for the giver to whom the donation should have been assigned.
-
Transfer Selection
Click
 .
.Confirm the transfer.
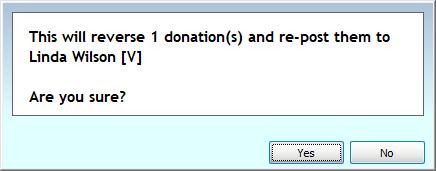
Upon completion of the transfer, you'll get an alert with the transaction numbers.
How to Transfer Donations to Consolidate Duplicate Records
In this scenario, one individual has multiple records and their donations are split up among them. Transferring donations to one record allows for the deletion or inactivation of the duplicate record.
-
Enter a Date Range
To expand or narrow that range, choose your dates and click
. Text on this button appears in maroon when changes have not yet been applied. Use the and buttons to quickly change the year.When consolidating giving between duplicate records, best practice is to transfer the entirety of giving history from the duplicate to the main record. Therefore, you should select a generous date range to capture all donations.
-
Select 'From' Giver
On the left side, search for the record of the duplicate account that you will later delete or mark as inactive.
Only givers with donations within the specified date range will list in the drop down.
-
Mark the check box in the center indicating this is giving history consolidation for duplicate records.
-
Select 'To' Giver
On the right side, search for the main record that you want all the donations assigned to.
-
Transfer Selection
Click
.Confirm the transfer.
Upon completion of the transfer, you'll get an alert with the transaction numbers.